![live.faith.homeschool.[sew].](https://blogger.googleusercontent.com/img/b/R29vZ2xl/AVvXsEiqdSm4p3-5HAX1sw-ajErf7HAwX75WrUjAhenjGMyoO18VVxeodwTiqcNRQ7TzV8aNLYcc6Rwcwhq6V57bN6Utzp2DpkL6jQTO1IhHVXzqQPz_5QF8pUxkB1-rs_uiRFBwZiUC5nNbaik6/s1600/blog+header+.jpg)
Dilemma:
Lemon yellow 6oz stretch denim that was supposed to arrive from Fabric.com as a lovely mustard colour to make myself another pair of jeans. This is a problem when you order fabric, you takes your chances, sewing girl. I have always had good luck ordering online, aside from the time they sent me yards and yards of flower fairy fabric that I didn't exactly order. But they always make amends, so that's good. Still, its a bit of a crapshoot, this business. But when life hands you lemons ... (c'mon, I couldn't resist).
Solution:
Class Picnic Shorts by Oliver + S. Oh yes. No? Yes. YES. They have been on my summer bucket sewing list since last year. I shouldn't have waited, because they are awesome! Two pairs to share today, one as written and one with ruffles.

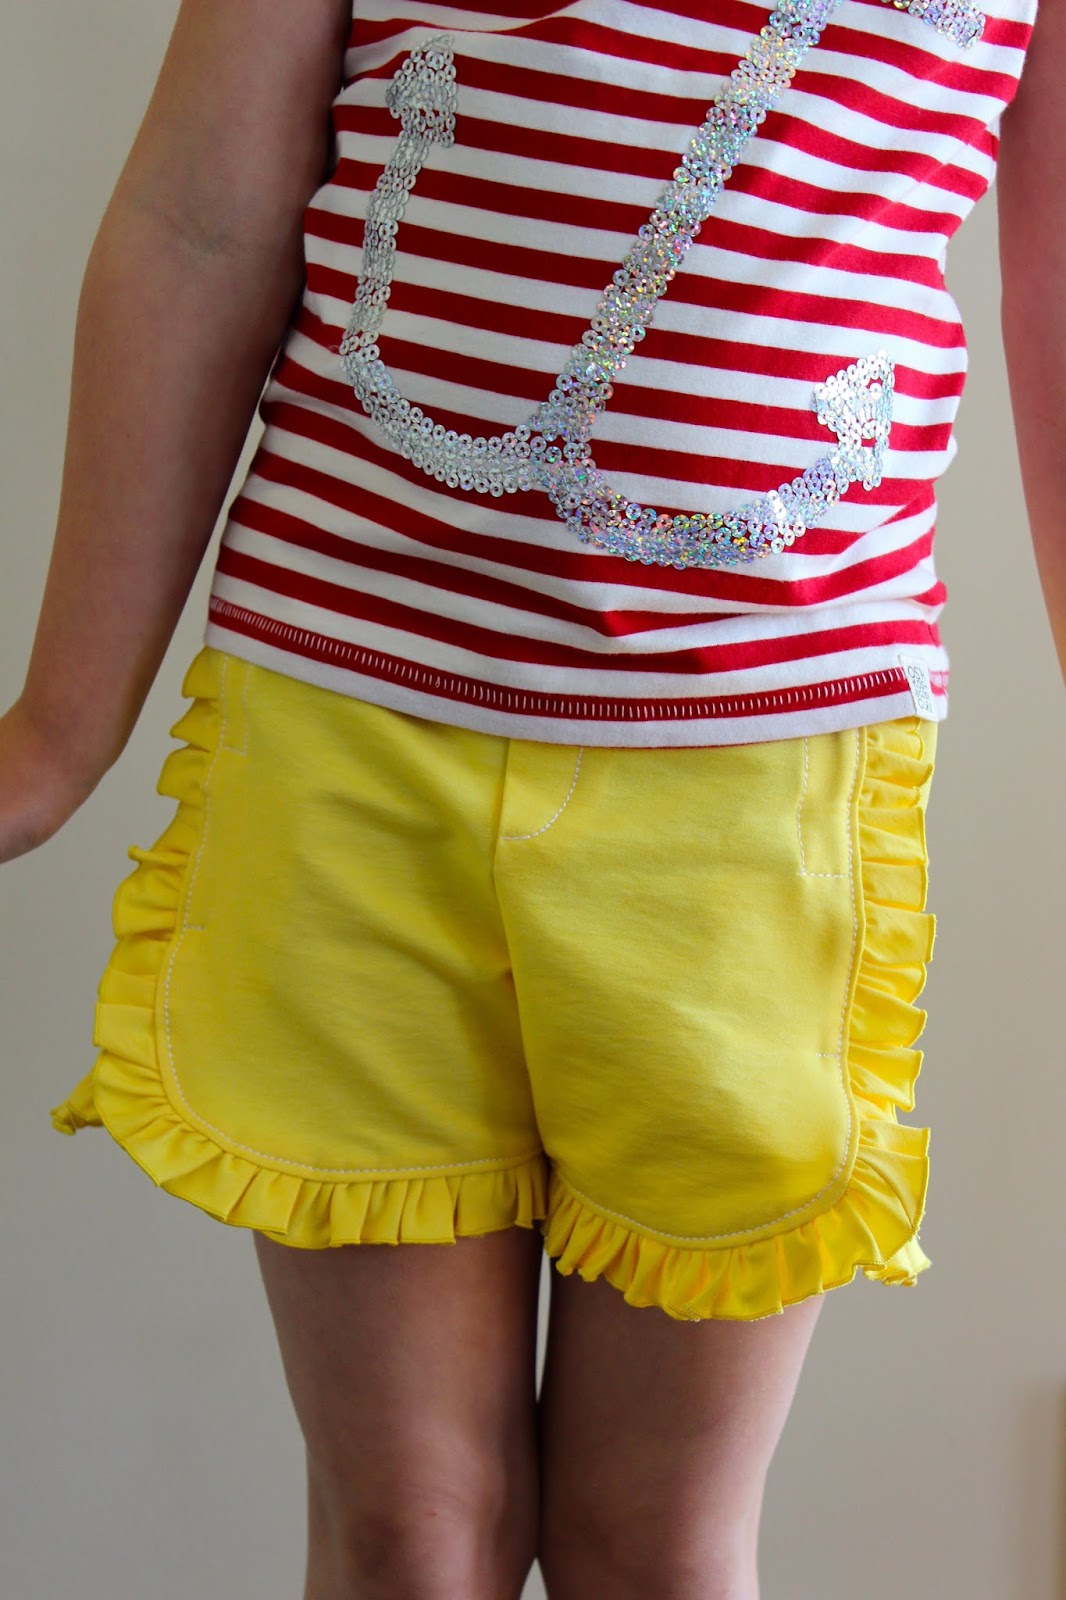
Please excuse the tucked-in shirt! She was obsessed with "seeing" the birdies in all their glory! These shorts are really sweet and not difficult to make. Just a few finicky parts. And I'll tell you about them in case you need a heads-up before you sew your own.

One. Interface both the front waistband and the front waistband facing instead of just the facing. It gives the shorts more structure in this area, especially if you are using quilting cotton for the shorts. This was a great tip from Gail, who, by the way, has made a couple of really cute versions of these shorts.
Two. Be VERY precise when overlapping and sewing the contrast facings (the birdies). If you're out a little bit, the front waistband will be either slightly too big or too small. In my case, the front waistband was just a tad too big. If this happens to you, when you attach the waistband to the shorts, sew with the waistband on the bottom of the waistband/shorts layer, next to the feed dogs, and your feed dogs will ease up that extra centimeter or two (this works even with a walking foot I find). You can stretch the top layer slightly as you sew as well. I also find it helpful to sew from the centre-front outwards to the centre-back, then repeat going the other direction.
Three. Allow some extra elastic in the waistband so the shorts can carry through the next season. Even better, consider using buttonhole elastic - there are instructions in the pattern for doing this. The shorts are quite roomy in the waist, so its worth it to do so. Here's a look at the back:

I didn't have any buttonhole elastic though, so I added an extra couple inches of elastic on the end and tacked it for next year. I'll show you what I did, but on rethinking my method, its wrong. This is the WRONG way to do it, even though it will do the trick:

What I should have done was sew the end down permanently, but still use enough elastic to add the fold of elastic on the other side of where its attached, then tuck the whole thing inside the casing. So all you'd have to do was unpick where you sewed the fold of elastic. The way I've done it, I will have to unstitch where I sewed it down to the waistband, unstitch the fold of elastic, AND restitch down for the new length of elastic. Oh well, thought you might as well learn from my mistake :). Or, maybe just buy the darn buttonhole elastic and be done with it.
Now, let me share Alexa's version of the shorts. Ruffles!
 |
| Class Picnic Shorts modified to add Ruffles. |

I followed the tutorial pretty much exactly but a few tips here too. First, the tutorial is written for a size 5, so when she tells you to topstitch down 4 inches when overlapping, well, you want to go a little longer for a size 7. I also had some fiddling to do when placing the overlap since I cut my ruffle strips 1 1/2" instead of 1 1/4". I wanted my ruffles to have a bit more depth. But keep in mind the overlap will dictate the length of the front waistband, so again my waistband was a smidge too big and I had to do some creative stretching. All turned out good though! And most importantly, she LOVES them.

I used my ruffler foot which is really more like a pleater. I rarely use this foot, so I'm not sure I'd recommend it, but boy it sure is slick when I do. And fast. I finished the ruffle raw edge with a rolled hem on the serger - that I definitely do use a LOT.
And a peek at the inside waistband using contrast fabric. Its Amy Butler. In case you were wondering.

 |
 |
Alrighty then, onto reading.
I am happy to report that I am officially out of my reading rut. While away camping on the weekend, I was able to get my head into a good book, that good book being Pride and Prejudice by Jane Austen, on my handy dandy kindle. I last read this in grade 7, and was not cultured for classics then. I am now, and this book is sooo fabulous. I'm at the part where Eliza is visiting Charlotte and Mr. Collins. I'm so interested to find out if she and Mr. Darcy will marry ... don't TELL me ... I'm savouring every minute.
How about you? What are you up to? Summer is a-passing quickly. Fall wardrobe ideas? Reading list? Please share! Linking up with Elizabeth who hosts needle and thREAD, so make sure to pop over there to see what others are sewing and reading.
God bless all your sewing and reading endeavours!

I'm really digging the ruffle ones! Both are adorable and your girls are delightfully cute models. Here's a link to DIY button hole elastic :o) ~Liz ago...http://www.nobigdill.com/2012/07/diy-buttonhole-elastic.html
ReplyDeleteLOL, of course, I guess there must be a way to make your own buttonhole elastic! Thanks for the link Liz! I'll go check it out!
DeleteI'm with Liz ~ the ruffle ones are my favorite. I love that Maria had to keep her shirt tucked so she could see her birds!
ReplyDeleteI don't think it would have occurred to me to make them so I could easily go back and adjust elastic ~ good thinkin'! (of course, I'm terrible with mending type things, so I'd probably never actually go back to 'fix' them later ;-) thus the buttonhole elastic...
I've never read P&P. Maybe I'll do that someday.... Have a great weekend :-)